
In this tutorial, we are going to build a Graphical User Interface (GUI) to acquire images from your webcam. We are going to use OpenCV to quickly acquire an image from your camera and PyQt5 to build the user interface. You may find a lot of tutorials online on how to use Python for different tasks, but it is very hard to find a complete guide on how to build a desktop application using Python.
Building GUI's is not complicated, what makes them complex are the considerations you have to make when you allow a user to randomly interact with your program. For instance, imagine that your program allows the user to choose the camera they want to use and then acquire an image. You have to consider what would happen if the user first tries to acquire an image. And this is only the tip of the iceberg.
When you finish this tutorial you will have a good overview on how to structure a project, separating into modules the important parts. You will also learn how to start developing a PyQt application from scratch, building on complexity step by step. Finally, you will have a working example of how to interface with a real world device using a user interface.
Installing OpenCV and PyQt5
The project is to build a user interface for your webcam. In order to do it, we are going to need two main libraries: OpenCV will be responsible for the acquisition, while PyQt5 is the framework we are using for the interface.
OpenCV is a very big package that can be used with different programming languages. It can handle all sorts of image manipulations, including face-detection, object tracking, etc. In this tutorial, we are not going to exploit all these possibilities, but you should be aware of the potential this library has. To install OpenCV, the simplest is to run the following command:
pip install opencv-contrib-python
Remember that the best practice is to be working in a virtual environment to avoid conflicts with other libraries, etc. The installation procedure should also install numpy. If you run into issues while installing OpenCV, you are free to ask them in the forum or you can check the official documentation.
To check that OpenCV was properly installed and configured, you can start the Python interpreter and run the following commands to see what version do you have available:
>>> import cv2
>>> cv2.__version__
'3.4.2'
The next step is to install PyQt5, which will also require a single command:
pip install PyQt5
Normally this procedure works, but PyQt5 can give some issues on some specific platforms. If you can't find solutions to your problems, the alternative option is to install Anaconda which will have all the packages already available on all the platforms.
To test whether PyQt5 is working, you can create a short script with the following:
from PyQt5.QtWidgets import QApplication, QMainWindow

app = QApplication([])
win = QMainWindow()
win.show()
app.exit(app.exec_())
If you run the file, a small, empty window should pop up. This means that everything is working correctly.
Finally, we need a library that will be able to show the images that we acquire with the webcam. There are several options to choose from. You can use matplotlib, which is a common tool for making plots, including 2D images. You can also use Pillow, which is a great tool for working with images in Python. A third option is to use pyqtgraph, a library that is not mainstream with normal Python developers, but that is used extensively in research labs.
Because of the background of this website, we are going to go for the third option: using PyQtGraph. On one hand, this will give visibility to an amazing project, spearheaded by Luke Campagnola. To install it, simply do the following:
pip install pyqtgraph
Now we are ready to develop the application.
Welcome to OpenCV
When developing this kind of applications, the first step is to understand what do we want to do before embarking on designing and developing a User Interface. OpenCV makes it very simple to read from a webcam attached to a computer, you simply do the following:
import cv2
import numpy as np

cap = cv2.VideoCapture(0)
ret, frame = cap.read()
cap.release()

print(np.min(frame))
print(np.max(frame))
In the first line, we initialize the communication with the camera. Of
course, if no cameras are attached, when you run the following command,
cap.read(), nothing will be acquired, but the program will not crash.
Finally, we release the camera. The last two lines are just printing the
maximum and minimum values recorded by the camera. Bear in mind that
frame is a numpy 2D-array.
To go one step forward, we can also acquire a video from the camera. The
only difference with the code above is that we need to run an infinite
loop, and in each iteration, a new frame is acquired and displayed. To
quit the application, you need to press Q on your keyboard. Note that
we are also transforming the image to grayscale. You can remove that
line and check how the image looks like.
import cv2

cap = cv2.VideoCapture(0)


while(True):
    # Capture frame-by-frame
    ret, frame = cap.read()

    # Our operations on the frame come here
    gray = cv2.cvtColor(frame, cv2.COLOR_BGR2GRAY)

    # Display the resulting frame
    cv2.imshow('frame',gray)
    if cv2.waitKey(1) & 0xFF == ord('q'):
        break

# When everything done, release the capture
cap.release()
cv2.destroyAllWindows()
Now we have a clear picture of how the acquisition process works. We
have to start the communication with the camera and then we can read
from it. There are some parameters that we can either change to the
image itself, like transforming to black and white, or to the camera.
For example, we could increase the brightness by adding the following
right after VideoCapture:
cap.set(cv2.CAP_PROP_BRIGHTNESS, 1)
Since you are setting the property to the camera itself, it won't
disappear until you don't set it back to 0.5, even if you restart the
program. You can check the documentation on
properties
to see what are the possibilities. Remember that not all cameras support
all the options, and therefore some errors can appear, or no visible
changes at all.
To make a video you need to continuously acquire from the camera, in an infinite loop. We are not going to enter into the details now, but this can be a problem if your frames take long to acquire, for instance, if you set longer exposure times.
Welcome to PyQt
Qt, similarly to OpenCV, is a general library, written in C++ and available for a lot of platforms. PyQt are python bindings to Qt, i.e. a translation of the original code to objects that can be used from within Python. The main difficulty of working with Qt comes from the fact that a lot of the documentation is not available for the Python bindings but for the original code. This implies that the user has to make a translation from one language to another. Once you get used to it, it just works fine but takes time to learn.
Note
There is a different set of bindings available for Python, called PySide2. They are the officially released bindings by Qt and, for practical matters, they work exactly the same. The main difference is the license under which they are released. If you are concerned about releasing your code, you should check the options.
A user interface consists of an infinite loop in which the windows are drawn, the user interaction is grabbed, images from the webcam are displayed, etc. If the loop is broken, the application finishes, closing all the windows. So, let's get started with a simple window:
from PyQt5.QtWidgets import QApplication, QMainWindow

app = QApplication([])
win = QMainWindow()
win.show()
app.exit(app.exec_())
In this case, the infinite loop is given by app.exec_(). If you remove
that line, you will see that the program runs, but nothing actually
happens. Placing the loop inside the app.exit() is a way of
guaranteeing that the application is properly closed when the loop stops
running. It is important to note that before defining any windows, you
should always define the application in which they are going to run. If
you alter the order, you will get a quite descriptive error:
QWidget: Must construct a QApplication before a QWidget
Aborted (core dumped)
In PyQt (or Qt in general) the building blocks of windows are called Widgets. A window is a widget, a button, dialog, image, icon, etc. You can even define your own custom widgets. In the code above, you see that there is only an empty window appearing, not too exciting. Let's add a button to the window:
from PyQt5.QtWidgets import QApplication, QMainWindow, QPushButton

app = QApplication([])
win = QMainWindow()
button = QPushButton('Test')
win.setCentralWidget(button)
win.show()
app.exit(app.exec_())
Buttons are called QPushButton. Parts of the code are always the same,
like the creation of the app, or the execution of the loop. When we
create a push button, we define also the text that the button will have.
To add the button to the window there are different options. In this
case, since we defined the window as a QMainWindow, we can set the
button as its central widget. Main windows work only if a central widget
is defined in them. The window looks like this:
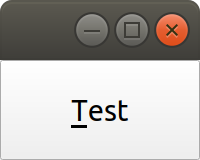
It looks very silly, but it is a very good start. The last remaining thing would be to do something when the button is pressed. In order to trigger something by a button press, you have to understand what Signals and Slots are in the context of Qt.
Signals and Slots in Qt
When you develop complex applications, such as one with a user interface, you may want to trigger different actions under specific conditions. For example, you may want to send an e-mail to the user saying that the webcam finished acquiring a movie. However, you may want later to also add the possibility of saving the video to the hard drive or publishing it to Youtube. At another time, you decide that you would also like to save the video when a user presses a button or publishing to Youtube when the computer receives an e-mail.
A very convenient way of developing a program in which you can trigger actions at specific events would be if you could subscribe functions to signals that are generated at certain moments. Once the video is acquired, the program can emit a message, which will be caught by all its subscribers. In this way you can write your code for acquiring a video once, but what happens when the video finishes can be easily changed.
From the other side, you can write the function to save the video once, and trigger it either when the video finishes or when a user presses a button, etc. The main thing to realize when developing user interfaces is that you don't know when things are going to happen. It may be that the user first acquires an image and then makes a video. It may be that the user doesn't acquire a video and tries to save the data, etc. Therefore, it is very handy to be able to trigger actions on specific events.
In Qt, the whole idea of triggering actions with certain events is defined with Signals, which get triggered at specific moments and Slots, which are the actions that will be executed. With the button that we have defined, an action, or signal, could be its pressing. The slot is whatever function we want it to be, for example, we will print a message to the terminal:
from PyQt5.QtWidgets import QApplication, QMainWindow, QPushButton

def button_pressed():
    print('Button Pressed')

app = QApplication([])
win = QMainWindow()
button = QPushButton('Test')
button.clicked.connect(button_pressed)
win.setCentralWidget(button)
win.show()
app.exit(app.exec_())
Notice that we first define the function, in this case button_pressed.
The real magic happens in the highlighted line. The signal that we want
to use is clicked, and we connect that signal to button_pressed
(note that we don't add the () in this line). If you run the program
again and you press the button, you will see a message appearing on the
terminal.
To continue on the same line of what it was discussed above, you could define a new function that gets triggered whenever the button is pressed. You will end up with something like this (I have removed the parts that are common to keep the example short):
def button_pressed():
    print('Button Pressed')

def new_button_pressed():
    print('Another function')

button.clicked.connect(button_pressed)
button.clicked.connect(new_button_pressed)
If you run the program again, you will see that every time you press the
button, two messages appear on the terminal. Of course, you could have
used functions that you import from different packages. The last bit in
order to provide a complete example is to add a second button and
connect its clicked signal to button_pressed.
Adding a new widget to a Main Window requires some extra steps. As we have discussed earlier, every main window requires one (and only one) central widget. The skeleton of the Main Window looks like this:
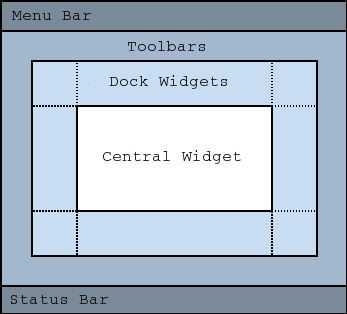
You can add all the normal things that a window has, such as a menu, toolbar, etc., but there is only one central widget. Since we want to add two buttons, the best would be to define an empty widget that will hold those two buttons. In turn, that widget will become the central widget of the window.
from PyQt5.QtWidgets import QApplication, QMainWindow, \
    QPushButton, QVBoxLayout, QWidget

app = QApplication([])
win = QMainWindow()
central_widget = QWidget()
button = QPushButton('Test', central_widget)
button2 = QPushButton('Second Test', central_widget)
win.setCentralWidget(central_widget)
win.show()
app.exit(app.exec_())
When we define the buttons, the second argument, means which element is
the parent of the widget. It is a fast way of adding elements to widgets
and to establish a clear relationship between each other, as we will see
later. If you run the code above, you will find only the Second Test
button appearing. If you would change the order in which you define
button and button2, you will see that actually, one button is on top
of the other. Since Second Test takes more space, it didn't let you
see the Test that was under it.
To set the position of the buttons (or of any other widget), you can use
the method setGeometry. It takes four arguments, the first two are the
position in x,y coordinates relative to the parent widget. Since widgets
can be nested, it is important to keep this in mind. The other two
arguments are the width and the height. We can do the following:
button.setGeometry(0,50,120,40)
This will move the button Test 50 pixels down and will make it 120
pixels wide and 40 pixels tall. If you run the code again, you will see
a window like this:
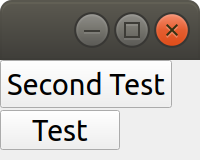
It is not a work of art, but you can see both buttons one on top of the
other. If you feel adventurous, you can play with the setGeometry
method of the main window. What happens if you make it smaller than the
space the buttons take, or larger, etc. With this kind of examples you
see how powerful Qt is, but also how complicated it may become to make
things look exactly as you want.
After all this digression to add two buttons, it is time to hook them to
functions. The procedure is the same as for one button, using the
clicked signal of each one of them:
button.clicked.connect(button_pressed)
button2.clicked.connect(button_pressed)
If you run the program again, you will see that regardless of what button you are pressing, the same function is executed. You can also connect both buttons to different functions, to more than one, etc. This programming pattern makes your code much simpler to maintain, but also more complicated to follow for beginners. Since the action to be triggered can be defined anywhere in a program, it may take a while to understand what happens when.
Adding Layouts for Styling
Adding two buttons by setting their geometry works, but is not the handiest thing ever. If you change the number of characters in a button, the text may not fit in the space, you need to keep track of the position of every button in order to add the other one just below, etc. With more complicated layouts, when you have input fields or different kinds of widgets, setting the geometry individually would be incredibly cumbersome. Fortunately, we can use Layouts to speed and simplify our design.
A layout is a way of telling Qt how to organize elements relative to
each other. For instance, if we want the two buttons one below the
other, we could use a vertical layout. Layouts are assigned to widgets,
and therefore to the central_widget. In our example it would become:
from PyQt5.QtWidgets import QApplication, QMainWindow, \
    QPushButton, QVBoxLayout, QWidget


app = QApplication([])
win = QMainWindow()
central_widget = QWidget()
button2 = QPushButton('Second Test', central_widget)
button = QPushButton('Test', central_widget)
layout = QVBoxLayout(central_widget)
layout.addWidget(button2)
layout.addWidget(button)
win.setCentralWidget(central_widget)
win.show()
app.exit(app.exec_())
And now the window looks much better:
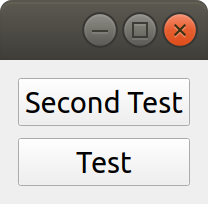
You can go ahead and try to resize the window and see how the buttons
adapt. Compare that to the case where you didn't use the layout. Of
course, you may want to put one button next to the other, in which case
you will use a QHBoxLayout, but the rest of the code is the
same.Connecting signals to functions works in exactly the same way,
because the button is the same, regardless of whether it is inside a
layout or not.
Acquiring An Image from the GUI
Now you have completed a first building step into how to start developing a user interface with Qt. However, it is time for us to do something with it. Since we are set in the task of controlling the webcam, we are going to do that. You have seen that connecting buttons to functions is very easy. We can use exactly what we saw earlier to read a frame from the camera. First, let's import OpenCV and define the functions that we are going to use:
import cv2
import numpy as np
from PyQt5.QtWidgets import QApplication, QMainWindow, \
    QPushButton, QVBoxLayout, QWidget

cap = cv2.VideoCapture(0)
def button_min_pressed():
    ret, frame = cap.read()
    print(np.min(frame))

def button_max_pressed():
    ret, frame = cap.read()
    print(np.max(frame))
You can see that we defined two functions, one that outputs the minimum value of the recorded frame and one that outputs the maximum. Now, we need to build the rest of the user interface and connect the two buttons to those functions. Pay attention to the new names that the buttons take:
app = QApplication([])
win = QMainWindow()
central_widget = QWidget()
button_min = QPushButton('Get Minimum', central_widget)
button_max = QPushButton('Get Maximum', central_widget)
button_min.clicked.connect(button_min_pressed)
button_max.clicked.connect(button_max_pressed)
layout = QVBoxLayout(central_widget)
layout.addWidget(button_min)
layout.addWidget(button_max)
win.setCentralWidget(central_widget)
win.show()
app.exit(app.exec_())
cap.release()
Every time you click one of the buttons, you will get a message on the terminal saying what is the maximum or minimum value in the image. The next step would be to display the image within the GUI. However, as you can see, the code starts to be less clear as we add more functionality. From a perspective of efficiency, it would be desirable to acquire the image once and then computing maximum and minimum. However, when having a simple script file, it becomes very complicated to share information. It is time to improve the layout of our program before going forward with the solution.
Layout of the Program: MVC design pattern
What we are going to do before continuing improving the user interface is to improve the code itself by developing different modules and classes that can be easily imported from a main file. When we refer to the names of the files, we will use bold characters, to avoid confusion. All the files should be located in the same folder, doesn't really matter where on your computer as long as you have write access.
Developing great and sustainable programs is a tough task that involves much more thinking than coding. There is no recipe that satisfies absolutely everyone. However, there are some common practices that can make your program much clearer to newcomers. There is a common pattern in programming known as the Model-View-Controller (MVC). You can read a lot about it, and most likely you will find plenty of examples on how to use it when developing websites.
When developing desktop applications that interface with real-world devices, then the meanings of each element in the MVC structure change. For instance, a controller would be the driver that is able to communicate with a device, which in our case is the camera. The driver was developed by OpenCV, but it is very likely that at some point we would develop our own drivers.
In the model, we would place all the logic of how we use the device,
which is not necessarily how the device was designed to work. For
instance, with the camera, we could implement a method called movie
even if the specific camera with which we are working only supports
acquiring single frames. We could perform checks, etc. according to how
we expect to use a device for our needs.
The view is clear that relates to the user interface and hence everything that belongs to Qt. It is important to note that a safe way of developing applications is by stripping all the logic from the view. If something is not supposed to run because the webcam is not ready, etc. then it should be the responsibility of the model and not of the view to prevent that from happening.
The MVC pattern is very common to find in different applications, however, you have to be flexible enough as to understand what each component means, especially when you are developing an application from scratch, as is the case in this tutorial. When you use frameworks such as Django or Flask for web development, the framework itself pushes you to follow some specific patterns. For desktop and scientific applications such frameworks are not as mature yet and you have to start from scratch.
If you want to see the code in its final version, you can check the Github Repository for this article.
The Camera Model
Since OpenCV took care of the controller of our camera, we can start developing the model for it. You can see in the repository how the final model will look like. The best idea is to generate a skeleton of what we want to do with our camera. Lay out the methods, inputs, etc. that we know we are going to use. And then we look into them. Create a file called models.py and include the following:
class Camera:
    def __init__(self, cam_num):
        pass

    def get_frame(self):
        pass

    def acquire_movie(self, num_frames):
        pass

    def set_brightness(self, value):
        pass

    def __str__(self):
        return 'Camera'
We are developing a very simple model for our device. If you want to see how a model looks for scientific cameras, you can see what I have developed for a Hamamatsu Orca camera. The advantage of developing a model at this stage is that if later I decide to change the camera or the driver, the only thing I need to do is to update the way the model works, and the rest of the program will keep running.
There are few things to note about the model. You can see that we expect
the __init__ method to take one argument, the camera number. This is
the argument that the VideoCapture of OpenCV requires. get_frame and
acquire_movie are going to be responsible for reading from the camera
and the set_brightness is an example of setting a parameter on a
camera. The __str__ method is going to help us if we need to identify
the camera and is going to be handy on our GUI.
We have the skeleton of the model, now is time to add some meaning to
the methods. The advantage of using a class is that we can store the
important parameters in the class itself. When we initialize, we should
store the cap variable, in order to make accessible to the other
methods.
def __init__(self, cam_num):
    self.cap = cv2.VideoCapture(cam_num)
    self.cam_num = cam_num

def __str__(self):
    return 'OpenCV Camera {}'.format(self.cam_num)
We have also modified the __str__ method in order to show that it is
an Open CV camera and its number. If you want to test the code quickly,
the best is to add a block at the end of the models.py file with the
following:
if __name__ == '__main__':
    cam = Camera(0)
    print(cam)
If you just run models.py, you will see a message printed to the
screen. You may have noticed also that in the example above, we are not
closing the camera, we have forgotten about that method! Of course, you
can always access the cam.cap attribute, but it would be much more
elegant not to access the controller itself, since later on, another
camera may use a different method for finalizing the communication. Now
that we are at it, we can define the new method:
def close_camera(self):
    self.cap.release()
And it could be actually nice to initialize the communication with the
camera not when we instantiate the class, but when we decide. In that
way, we can re-open the camera even if we have executed the
close_camera method.
def __init__(self, cam_num):
    self.cam_num = cam_num
    self.cap = None

def initialize(self):
    self.cap = cv2.VideoCapture(self.cam_num)
In the __init__ method we define self.cap as None because it is a
style rule to define all the attributes of the class in the
initialization. In that way, you can see very quickly what attributes
you will have available. It will also allow you to check whether the
cap is defined before you try to do something with it. With these
changes, you will also need to update the example at the bottom of the
file:
if __name__ == '__main__':
    cam = Camera(0)
    cam.initialize()
    print(cam)
    cam.close_camera()
Now the interesting part comes. We have to define the methods for reading the camera. We have to decide also if we want to return a value that can be used by another module or if we want to store the values in the class itself. We can also combine both options:
def get_frame(self):
    ret, self.last_frame = self.cap.read()
    return self.last_frame
If you are following from the beginning, it should be clear to you what
is happening. You can also see that we are storing the frame as
self.last_frame within the class itself. If you want to show how to
use it, you can update the code at the end of the file. So far, we have
something like this:
if __name__ == '__main__':
    cam = Camera(0)
    cam.initialize()
    print(cam)
    frame = cam.get_frame()
    print(frame)
    cam.close_camera()
Which will output a very long array, with all the values read by your camera. Now we can work on the movie method. We have seen at the beginning that movies are just acquiring images one after the other, in an infinite loop. Since infinite loops are a bit dangerous (it is hard to stop them nicely), we will add a parameter called number of frames.
def acquire_movie(self, num_frames):
    movie = []
    for _ in range(num_frames):
        movie.append(self.get_frame())
    return movie
We start by generating an empty list in which we are going to store the
images and then we start a for-loop for the given number of frames. In
each iteration, we append the data generated by the method get_frame.
One of the advantages of this is that we are going to automatically have
the last_frame attribute available.
Note
when dealing with more sophisticated cameras, normally the starting of a movie and the reading from the camera are done in two separate steps. This ensures the correct timing between frames, even if the program is running slower.
You may already see that the method is not efficient at all. Appending to lists can be very slow, if the numbers of frames are too many it will give memory errors, etc. For the time being, we can work with this.
The last remaining method to develop is the set_brighntess. This one
is much easier, you can do the following:
def set_brightness(self, value):
    self.cap.set(cv2.CAP_PROP_BRIGHTNESS, value)
You can also ask yourself if it is possible to get the value of the
brightness, and it actually is if you replace cap.set by cap.get.
The same is valid for all the properties of the camera, such as the
number of pixels, etc. We can develop a new method, not considered when
we started, called get_brightness:
def get_brightness(self):
    return self.cap.get(cv2.CAP_PROP_BRIGHTNESS)
And to use both methods, you can improve the __main__ code:
cam.set_brightness(1)
print(cam.get_brightness())
cam.set_brightness(0.5)
print(cam.get_brightness())
Remember that since you are setting parameters to the camera, they are going to stay, even if you open the camera with a different program. If you set the brightness too low or too high, you will notice it on your next Skype call (true story).
Now that the model is ready, we can start developing a user interface.
Reusable Qt Windows: Subclassing
When we started to play around with Qt windows, we have developed everything as a script file that you could run. However, it is very hard to maintain and reuse that kind of code. The easiest is to develop classes that inherit from the base Qt classes. For example, let's reproduce the window with the two buttons, but in a more elegant way. Let's start by creating a file called views.py and add the following to it:
from PyQt5.QtWidgets import QMainWindow, QWidget, QPushButton, QVBoxLayout, QApplication


class StartWindow(QMainWindow):
    def __init__(self):
        super().__init__()
        self.central_widget = QWidget()
        self.button_min = QPushButton('Get Minimum', self.central_widget)
        self.button_max = QPushButton('Get Maximum', self.central_widget)
        self.layout = QVBoxLayout(self.central_widget)
        self.layout.addWidget(self.button_min)
        self.layout.addWidget(self.button_max)
        self.setCentralWidget(self.central_widget)
You can find the final version of the
views
file in the repository as well. What we have done here is very similar
to what we did earlier with the two buttons, the only difference is that
we have moved everything into a class called StartWindow that inherits
from QMainWindow. This is a very efficient way of extending the
functionality of classes. We have to run super().__init__ in order to
have all the properties of the Main Window available also in our class.
We define an empty widget, two buttons, and a layout, exactly as we have
done before. The most important thing is that we add the self. before
the attributes in order to be able to use the buttons, layout, etc. in
any part of the class.
To use the window, the code becomes much simpler. You can add it at the end of views.py:
if __name__ == '__main__':
    app = QApplication([])
    window = StartWindow()
    window.show()
    app.exit(app.exec_())
It only takes four lines now to have a window with the two buttons nicely displayed. If you want to add functionality to the buttons you can add methods to the class, pretty much the same as before, but instead of plain functions, they become methods of the class:
def __init__(self):
    [...]
    self.button_max.clicked.connect(self.button_clicked)

def button_clicked(self):
    print('Button Clicked')
I have removed some lines in order to keep the example short. The advantage of this procedure is that the code to run is exactly the same. Just run views.py and you will get the same window as before, plus the added functionality of the button.
Displaying an Image on the GUI
Now we are ready to do something more interesting, like displaying an
image onto the GUI. First, we need to decide how are we going to trigger
the camera. Ideally, we are going to have the model for the camera
available in the StartWindow class so the method would look something
like this:
def update_image(self):
    frame = self.camera.get_frame()
    # Plot_the_frame
This works only if we have self.camera available. The best, in this
case, is to take the camera as an argument in the __init__, like this:
class StartWindow(QMainWindow):
    def __init__(self, camera):
        super().__init__()
        self.camera = camera
This strategy is what allows us to combine the models and the views in a
very simple way. You could find better solutions, of course, but this
one is easy to debug and implement. It also implies that there is a
third file in which you combine models and views. But before focusing on
that file, let's finish up with the view in order to do something with
the camera. First, let's update the buttons and connect one of them to
update_image:
import numpy as np

from PyQt5.QtWidgets import QMainWindow, QWidget, QPushButton, QVBoxLayout, QApplication


class StartWindow(QMainWindow):
    def __init__(self, camera = None):
        super().__init__()
        self.camera = camera

        self.central_widget = QWidget()
        self.button_frame = QPushButton('Acquire Frame', self.central_widget)
        self.button_movie = QPushButton('Start Movie', self.central_widget)
        self.layout = QVBoxLayout(self.central_widget)
        self.layout.addWidget(self.button_frame)
        self.layout.addWidget(self.button_movie)
        self.setCentralWidget(self.central_widget)

        self.button_frame.clicked.connect(self.update_image)

    def update_image(self):
        frame = self.camera.get_frame()
        print('Maximum in frame: {}, Minimum in frame: {}'.format(np.max(frame), np.min(frame)))
The structure is exactly the same, we have just updated the name of the buttons and the text on them. In order to use both the model and the view, we have to create a new file, that we can call start.py, and add the following:
from PyQt5.QtWidgets import QApplication

from models import Camera
from views import StartWindow

camera = Camera(0)
camera.initialize()

app = QApplication([])
start_window = StartWindow(camera)
start_window.show()
app.exit(app.exec_())
As you can see above, we are importing the model and initializing it,
and then we are passing it to StartWindow. The rest is the same as in
the example at the bottom of the views.py file. If you press the
Acquire frame, you will see in the terminal the values of the
intensities recorded by the camera.
Now we are only one step away from displaying the image recorded by the camera on the GUI. This is where PyQtGraph comes into action. We have to add a new widget that can hold the image. I am removing all the code that doesn't change, just to highlight the important pieces:
from pyqtgraph import ImageView

class StartWindow(QMainWindow):
    def __init__(self, camera = None):
        [...]
        self.image_view = ImageView()
        self.layout.addWidget(self.image_view)
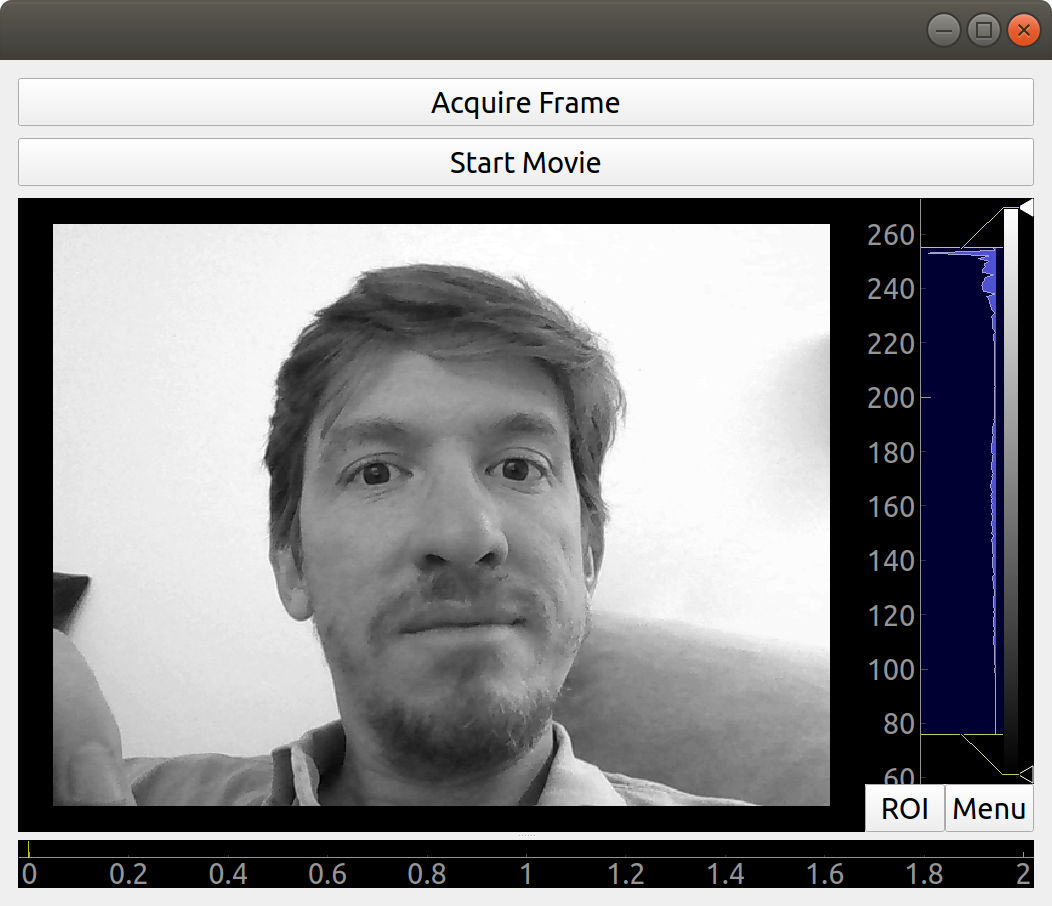
If you run the start.py again, you will notice a black area just below the buttons, that is where the image will appear. Next, we can update the method for acquiring the image in order to display the data:
def update_image(self):
    frame = self.camera.get_frame()
    self.image_view.setImage(frame.T)
Run again the program, and you will get something like the image below, you can take a selfie with the press of a button, how cool is that?
Notice that we are updating frame.T instead of frame, this is a
matter of how pixels are organized and how PyQtGraph assumes they are.
The T is just to transpose the matrix, exchanging columns for rows. If
you play a bit around with the program, you will notice that you can
zoom in and out with the mouse scroll, you can change the levels and the
color profile. Of course, PyQtGraph is not really aimed at photography
but at scientific data. Not all the options are handy for a webcam, but
you can find some cool things around.
Adding a Scrollbar for the Brightness
Before we move to the problem of acquiring a movie continuously, let's
add a slider that can control the brightness of the image. As usual,
everything starts within the __init__ method. I am showing only the
relevant code:
from PyQt5.QtCore import Qt
from PyQt5.QtWidgets import QSlider

class StartWindow(QMainWindow):
    def __init__(self, camera = None):
        super().__init__()
        self.slider = QSlider(Qt.Horizontal)
        self.slider.setRange(0,10)
        [...]
        self.layout.addWidget(self.slider)
The code above will generate a horizontal slider. The range only works with integer numbers, so we set it between 0 and 10 to later transform it to float values between 0 and 1. Sliders have a signal emitted when the value of it changes, pretty much the same as when the button is clicked. We can do:
def __init__(self, camera):
    [...]
    self.slider.valueChanged.connect(self.update_brightness)

def update_brightness(self, value):
    value /= 10
    self.camera.set_brightness(value)
The signal, when is emitted, comes together with the value and will be passed as argument to the function to which you connected it. Since brightness is in the range from 0 to 10, we have to convert the value of the slider before sending it to the camera. Of course, the changes are not going to be reflected until you acquire a new image. If you want, you could also connect the change of the slider to acquiring an image.
Acquiring a Movie: QtThreads
The next and final step in our User Interface is to add the possibility
of acquiring a movie. Let's start with the obvious, connecting the
button to the method in the camera model. Since we need to specify the
number of frames, we can start with a default one, even if fake, just
for testing:
def __init__(self, camera):
    [...]
    self.button_movie.clicked.connect(self.start_movie)

def start_movie(self):
    self.camera.acquire_movie(200)
If you try the code at this stage, you will notice that when the movie
starts, the User Interface becomes not responsive. If you are on
Windows, it may even happen that you get a notice asking if you would
like to close the program. This happens because the method
acquire_movie takes long to execute, and it prevents the app loop to
keep running. To avoid this, we need to move the acquire_movie method
to a new thread, in order not to block the main thread.
There are different ways of achieving the same, we are going for the
simplest to implement. We are also going to add a timer that will update
the image periodically, using the last_frame attribute that we already
have available. First, in the views.py we define a new class called
MovieThread:
class MovieThread(QThread):
    def __init__(self, camera):
        super().__init__()
        self.camera = camera

    def run(self):
        self.camera.acquire_movie(200)
To use it, we need to update the start_movie method:
def start_movie(self):
    self.movie_thread = MovieThread(self.camera)
    self.movie_thread.start()
With just this code, we are starting a new thread in which the camera will be acquiring frames, but we are still not displaying them. For this, we will create a timer, which will be responsible for periodically updating the picture that is being displayed.
While you acquire the movie you can also change the brightness and see the output in real time. You can find the complete code in the Examples Folder of our repository
Extra Steps that You Can Try
Now that you have a good overview of how to develop a user interface, I
will leave some extra points for you to work on. One is that we are
setting the number of frames of the movie hardcoded into the program.
You can add a QLineEdit widget in order to let the user define the
number.
Another thing that is missing is the possibility of continuous acquiring
a movie. To do so, you could change the loop in the model and make it
run forever if you set the number of frames to 0, or None. However,
if you do this, you will have to find a way to stop the recording of
the movie.
Finally, the model is accumulating all the data into an attribute. It could be nice to have the option to save the movie or the picture somewhere. You can add an extra button to achieve it, and if you are willing, you can use HDF5 files to store the data.
Conclusions
In this article, you have seen everything that it takes to start building user interfaces interfacing with real-world devices such as a camera. What you have seen is only the tip of the iceberg, there are many, many more things to cover in order to achieve more complex behaviors. However, it is a very good kickstart for structuring larger projects. From here on, you can experiment as much as you want, the options are endless.
If you build something that you would like to show to the rest, you can do it at the forum. You can also check our book, in which we cover many more details about designing software and building user interfaces.
Header Photo by Alvaro Reyes on Unsplash